HO Scale Couplers
There are many types of couplers available for those who model Civil War era railroads.
Knuckle Couplers
HO scale ready-to-run freight cars used to come with NMRA style horn hook couplers. These same rtr cars now come with knuckle style couplers. If you decide to keep the newer knuckle style couplers, there are many options that are drop in replacements for the old horn hook style couplers. Some that come to mind are Athearn, E-Z Magnetic, Bachmann, Kadee (many variations for different manufacturers' cars), Life-Like, and Walthers. Since I intend to focus on link & pin style couplers, I will not go into detail on these knucle couplers except to point out that ACWRRHS group member and author Don Ball uses Kadee #58s and Kadee #711 (714) on his 1895 Stockton & Copperopolis RR.
Here are the Kakee #58s:


Here is a Kadee #711:

Here is a Kadee 713 (same as the 711 but in rust color):

Link & Pin Couplers
I prefer the more prototypical link & pin style coupler. If you decide to go with link & pin couplers, keep in mind that your track plan must ensure all switching be within 18" of the front of the layout. Reaching up to 24" to uncouple is not that bad, but trying to recouple is [expletive deleted]. There are different types of pins used for these couplers. You can make your own pins out of straight pins, pieces of brass wire, or use model shipbuilding belaying pins. These ship modeler belaying pins can be purchased through Model Shipways company (Welcome to - (modelexpo-online.com). You can purchase them in 3/16", 1/4", and several mm sizes. You get about 150/pack. That is enough to equip 75 cars. Though not cheap, they look good and work well.

There are a number of vendors offering HO scale link & pin couplers. Most of these are actually designed for On3 scale modeling so whatever I write about HO scale availability also goes for O scale.
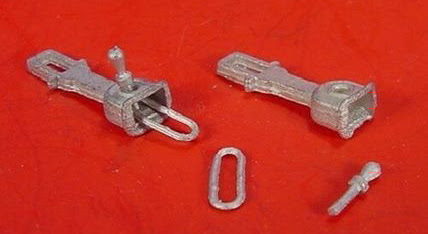
Alexander/Iron Horse Miniatures
These are the brand of link & pin couplers used by my friends Thom Radice and Lebron Matthews on their Western & Atlantic Railroad layouts. Sometimes they can be found under the Alexander brand name and other times under the Iron Horse Miniatures brand name. These are white metal castings using white metal pins, or brass pins, depending on the vendor. If you have an old craftsman old timer kit with link & pin couplers included (such as the old Highballer kits), chances are those couplers are from Alexander. These normally are fit into a Kadee #4 coupler pocket into which they are placed along with their springs. Look for these in the dusty bins of old hobby stores, at train shows, and online auctions like eBid or eBay.
Here is an example:

Here are some images of Alexander couplers installed on Thom Radice's equipment:
 |
| Photo Courtesy of Thom Radice |
 |
| Photo Courtesy of Thom Radice |
 |
| Note that these drawheads allow for small differences in coupler height. Photo Courtesy of Thom Radice |
Hi-Baller
As you can see from the following photo, these are the same as the Alexander/Iron Horse miniature couplers. Look at the actual couplers in the lower left hand corner of the image. Though marketed for HO scale, they are the same size as the Alexander couplers and, as mentioned previously, they are actually larger than the drawheads would be in HO scale.

Colonial Castings
These are white metal castings similar to the Alexander Link & pin couplers. I have no photos of these and cannot locate the ones I had in my inventory at one time. I may have sold them when I decided to use the San Juan Models/Grandt Line couplers exclusively.
These are white metal castings similar to the Alexander Link & pin couplers. I have no photos of these and cannot locate the ones I had in my inventory at one time. I may have sold them when I decided to use the San Juan Models/Grandt Line couplers exclusively.
PSC produces a number of different style link & pin couplers in brass. A number of these are designed to fit onto the rear of a tender. They are offered with either 2 or 3 pockets. Here are a few examples of those:
 |
| PSC 2 pocket drawhead |
 |
| PSC 3 pocket drawhead. Image courtesy of Thom Rafice |
 |
| PSC 3 pocket drawhead on one of Thom Radice's 4-4-0s. Image courtesy of Thom Radice. |
 |
| This PSC version has open sides. It makes the coupling process more difficult. |
PSC also produces the closest coupler correctly sized for HO scale. Prior to PSC these were produced by Kemtron.


Here is a comparison of the PSC drawhead (on left) with one (no longer available) from Keyport Car & Foundry (on right). The Keyport couplers are made of brass and are slightly smaller than the Alexander couplers discussed earlier.

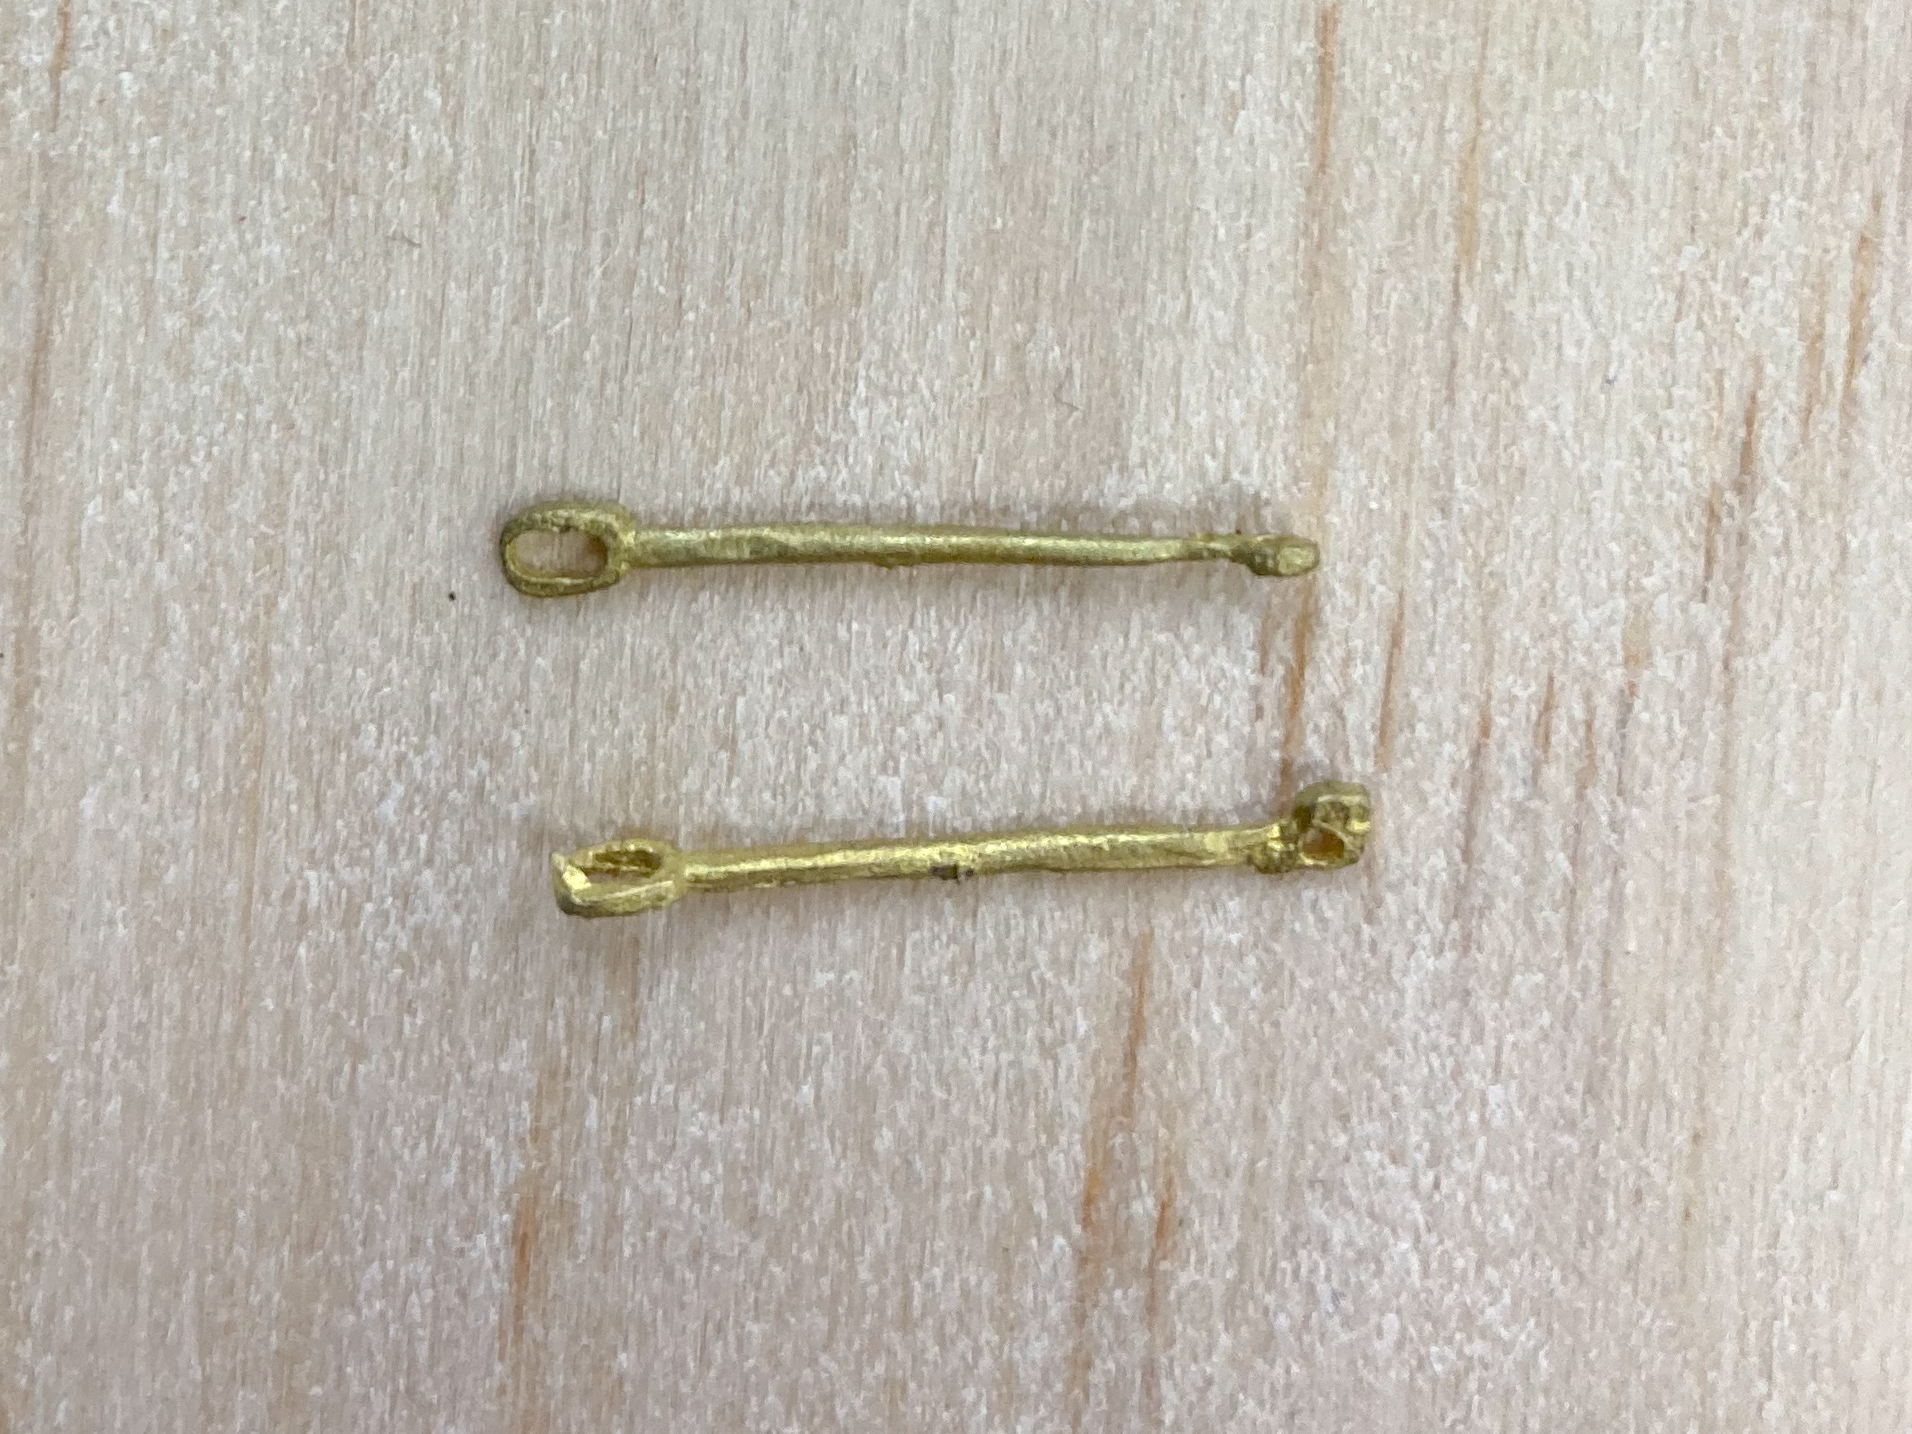
I have taken a Dremel tool and cleaned out the inside of the PSC drawheads and then drilled the drawheads so as to enable a small straight pin to easily pass through. I quickly migrated from using straight pins to using brass diesel engine lift rings as seen in the below photos. The ring portion of the lift ring resembles the head of a prototype pin I have seen in some photos. In fact, somewhere I saw a prototype image with a chain through a pin's hole and the other end bolted to the car body. Please don't ask me where I saw this image or when the photo was taken. I can say with certainty, however, from working one summer on the Chicago & Northwestern, that employees have been known to chuck tools and the other like heavy objects into the weeds along the right-of-way so they did not have to carry them around. Prototype iron pins are NOT light. Need I say more as to why I infer as the purpose of the chained pins. And just in case someone should doubt my veracity as to their existence, here is a photo from my personal Civil War railroad artifact collection.

To link these PSC drawheads, I have taken brass wire and cut it to the same length as the links used in the Alexander couplers I then flatten each end of this link with a flat faced plier and drill a hole in each end so that I can insert it in the drawhead and secure it with my homemade pins. I only use these on "unit train" rolling stock as it takes a long time for me to couple or uncouple a car, the pins have a penchant for flying into a parallel universe, and I am just not that patient. While trying to get an image for this post, I lost 2 pins in the process.😖😒😠😡😢

 |
| Scratch built 4 wheel oil barrel care on left, wood car on right staged on a diorama I built. |

Comstock Car Shops
Now defunct. They offered HOn3 drawheads like those offered by PSC but Comstock's were white metal. They came with a cast metal end beam, cast drawbar, and small straight pins.

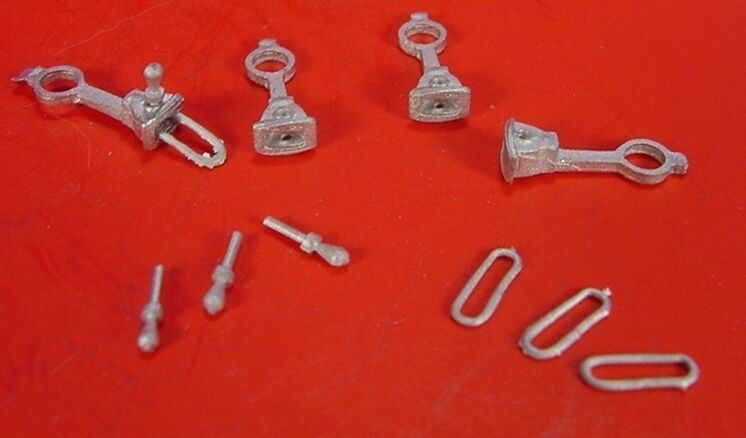
Wiseman Model Services Wiseman Model Services
Wiseman makes O and On30 (On3) link & pin couplers similar in size to Alexander's link & pin couplers. You can order directly from Keith's site or find them listed on eBid.net (link & pin couplers | Items for Sale in Toys & Hobbies > Model Railroads & Trains in United States (ebid.net). I have never purchased them so do not have any experience as to how well they work. They are offered in a number of shank styles as seen below. Keith also offers a G scale link & pin coupler as well as many other brass, white metal, and resin castings.


You can purchase link and pin couplers from Prescott Hobbies directly by clicking on the accompanying link or by visiting their eBay store. I have no personal experience with these couplers but George Bogatiuk at Soundtraxx has and likes them allot. They are a 3D printed coupler with brass pins and metal links. What follows are photos from their website. The Prescott description indicates these can be used in Kadee coupler pockets as they are "compatible with popular coupler centering devices such as the Kadee Copper Centering springs." In the last 2 images, please note how closely the 2 cars are coupled. Though prototypical, I recommend more spacing between the drawheads by using a longer link fashioned from brass wire such as that available through Tichy Train; especially if using 24" or smaller radius curves.


 |
| The 4 above photos are courtesy of Prescott Hobbies |
West Side
I don't know anything about this company other than I bought this somewhere online or at a train show. The back of the package is imprinted "Russ Simpson, Smith Flat, CA 95727." I cannot find any information on this company on the internet. I have not tried working with these couplers. Assembly is required and a package only does 1 car.

San Juan Models/Grandt Line San Juan Model Company — San Juan Model Co.
The couplers I like best were originally offered by Grandt Line. These couplers are now available through San Juan Models by following the accompanying link to their website. They are plastic and come with their own plastic links and pins. I like the longer links that come with the sets even though the shorter links are more prototypical. The longer links are better on sharper curves and allow more space between cars for easier coupling/uncoupling. Though these are designed for On3 scale models, they are smaller than other brands marketed as HO scale. They are also the cheapest couplers currently on the market. There are 3 different styles.
Porter 8 ton Coupler #158
I use these on my passenger equipment. They come 4 to a pack so a pack can do 2 cars. Note the 2 different style pins and 2 sizes of links. I think the longer links work best. I use 3/16" ship belaying pins from Model Shipways instead of these pins. I install the couplers using screws that I tighten down and back out slightly to allow for lateral (side-to-side) movement of the coupler in my homemade coupler pockets.


 |
 |
| San Juan #158 coupler installed on a Delaware Central monitor roofed 1st class passenger car. I may reinstall the couplers on these pieces of equipment at a later date so they don't extend so far out from the car body. It would look better but I want to see how they operate once I get the layout trackwork done. These will be the longest cars operating on my layout. |
 |
| Note how the coupler shank is inserted through a homemade coupler pocket. The pocket is made from 3 pieces of styrene, one on each side of the shank connected by a cross piece. This ensures there isn't too much sag in the coupler. |
Link & Pin Coupler #147
I cannot find these on the San Juan site at the moment. However, San Juan owns all of the old Grandt Line product line so I suspect they will become available again in the future. These also come in 4 per pack so a pack can do 2 cars. Sometimes a round bushing needs to be installed in the coupler pocket as the diameter of the lug into which the coupler is screwed is smaller than the inside diameter of the mounting hole on these couplers. I also like to sand down the edges of the faces of the drawheads to more closely match those on the San Juan Gilpin Tram couplers.

 |
| San Juan #147 installed in a MDC/Roundhouse coupler pocket. Note how the edges of the face of the drawhead have been filed & sanded down. |
 |
| Another view of the same installation |
Gilpin Tram Couplers #72
These are my favorite couplers to use. They are the smallest operable coupler currently on the market as of this writing. A pack can do 3 pieces of rolling stock.


I can never leave well enough alone. First of all, I cut and sand off all flash and mold lines from the drawhead. I do this for any couplers I use, even the brass and cast metal Alexander couplers I used to use. I then modify the stock coupler by carefully cutting out the cast spring with a #11 Exacto blade. I insert the blade in one end and push down a couple of times. Then I go to the other end of the spring and repeat this process. Then I reverse the blade and do the same thing to both ends from the other side. Next I flip the coupler over and repeat all of these steps from the opposite side. The spring usually pops out somewhere in the middle of this process. Once the spring is removed, I take a small, square needle file and file off any nubs left over from the cutting out process. Next I insert a 0.1" x 0.1" x 0.1" square of Evergreen styrene into this opening and glue in place with Testors or similar plastic cement. When dry, I drill out a hole large enough to allow my mounting screw to pass through freely. Depending on my under car clearances, I sometime countersink the screw head as you will see in the last photo in this section. Finally, I screw the drawhead onto the car body.


Here are the 3 styles of San Juan link & pin couplers for a side by side comparison. The Gilpin Tram style coupler in the center has been modified as described above.

Coupler Size Comparizons
Here are a couple of images so you can see the difference between coupler sizes:
 |
| From left to right: Alexander, Keyport, Grandt Line/San Juan Hobbies, modified Grant Line |
 |
| PSC true to scale drawhead on left, Keyport drawhead on right |
How the heck do you do it?
Now, the question naturally arises as to how one is to get one's fingers between HO scale cars for coupling and uncoupling. The answer is, you don't. Tweezers as seen in the following images are used for inserting and removing the pins. On Thom Radice's layout, we normally leave each car with a link and pin inserted in one car end. This saves time when assembling or disassembling trains.
Now, the question naturally arises as to how one is to get one's fingers between HO scale cars for coupling and uncoupling. The answer is, you don't. Tweezers as seen in the following images are used for inserting and removing the pins. On Thom Radice's layout, we normally leave each car with a link and pin inserted in one car end. This saves time when assembling or disassembling trains.
 |
| My favorite is the tweezer in the middle |
 |
| A closer look at the tweezer heads |
Here are the tweezers we use on Thom's layout:
 |
| Photo courtesy of Thom Radice |
Note that the lower tweezer is an illuminated style which greatly aides in inserting and removing pins.
What is the difference between a link and a drawbar?
Links and drawbars serve the same function by connecting two drawheads together.
Here is a prototype link with 2 pins:


 |
| One of Al Mueller's link & pin installations. Coupler just viewable on right. Image Courtesy of John Bopp. |
 |
| A better view of the installation also courtesy of John Bopp |
Here is a method the late Harold Minkwitz used in his link & pin coupling system: Operational Link and Pin Coupling (pacificcoastairlinerr.com). I am sure there are more.
Worth repeating is the difference in drawbar length between Prescott Hobbies and everyone else. The distance may be more prototypical for the Prescott Hobbies links but the longer links makes coupling and uncoupling easier. The longer links have the additional advantage when it comes to curves. They allow operating on tighter radii.
Drawhead Height
I go to great pains to ensure my drawheads are all at the same height. Drawhead pockets allow some vertical (up/down) as well as lateral (side to side) movement of links which helps keep rolling stock rolling freely and not derailing. However, no matter what coupling system you use, any of the link & pin or the knuckle coupler, there are limits in the amount of play in each technology. For link & pin couplers there are several solutions to work within these constraints.
I use an NMRA HO height gauge to ensure consistent coupler heights.
 |
| The hole in the NMRA gauge and the hole in the drawhead should line up |


 |
| Samples of the wood and styrene shims I use |
If my drawheads are too low, I use either shims glued onto the bolster or thin washers to shim up the car.
Another method of dealing with inconsistent drawhead height is to use an "S" link as shown in the following photo of a car on Thom Radice's W&A North Branch. Note how Thom paints these "S" links red so that he can readily pick them out from a small container of links & pins kept at each of his switching locations.
 |
| Photo courtesy of Thom Radice |
Pilot Drawbars
There are special links that can be installed on engine pilots. Here is an example of one of these Thom Radice installed on one of his 4-4-0s. He uses PSC part number 40186. These will add versatility to your engines for switching operations.
 |
| Image courtesy of Thom Radice. |
 |
| Kemtron couplers in packet on left, Keyport couplers on right. |
Here is a closeup of two of these HO scale drawbars as offered by the now defunct Keyport Car & Foundry.
This type of pilot drawbar could also be made by the modeler using 0.025 brass wire, flattening the ends at 90 degrees to each other, and then drilling out the holes.
Addendum
The following information was supplied to me by Tom O. of the ACWRRHS:
 |
| Photo by DC Cebula |
Simpson Models, simpson.models@verizon.net
Wiseman has the 387 link and pin from Westside by Russ Simpson 25 pair. $5.00/pr


Foothill has a very nice link and pin for $3.00/pr or 10 pr
for $25.00.
http://www.foothillmodelworks.com/DetailPt.html
scroll down to get to couplers
No comments:
Post a Comment